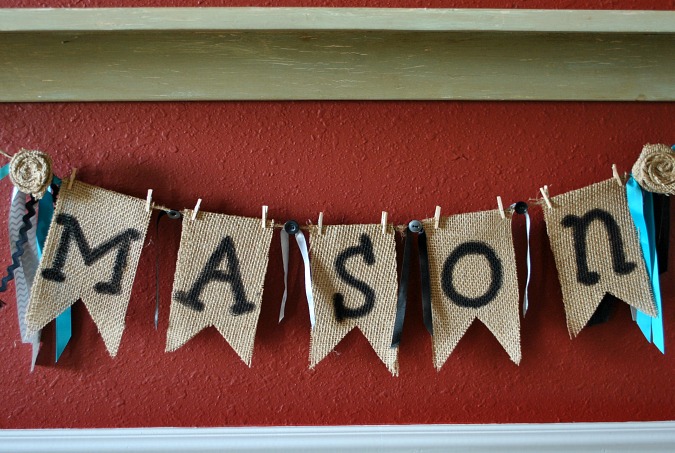
A while back I posted a craft idea similar to this burlap sign called No-Sew Patriotic Bunting and I had so much fun making it I wanted to share this idea as well. This project I’m sharing was for a baby shower for one of my friend’s daughters. I offered to make this sign for the shower as a decoration but also something that she could hang in her baby’s room. I looked on Pinterest for ideas and then made my own sign from there.
 If you’re a crafty person you probably have most of these supplies at home right now. The only thing I had to buy was the grey chevron patterned ribbon I used and the tiny close pins because I had the rest on hand.
No-Sew Burlap Sign


Supplies:
Twine
scissors
glue gun
letter stencils
permanent marker or craft paint
burlap fabric
ribbons
tiny close pins
buttons
thread
needle
heat bond
Directions:
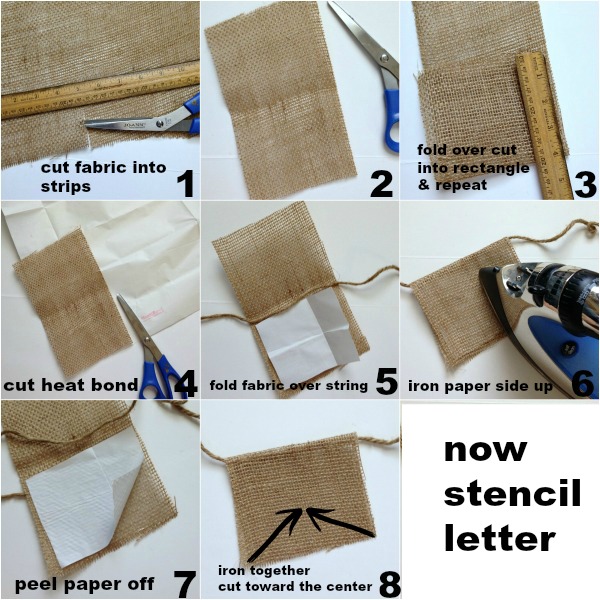
Step 1: First I figured out how big and long I wanted my sign to be, and then I measured the twine and cut it and made a loophole knot at each end.
Step 2: Get burlap fabric and measure how big you want your flag or pennant to be. My sign depended on the size of my stencil. I measured how long I wanted the pennant to be across, then cut the burlap into a long strip.
Step 3: Now fold over the strip of fabric to how long you want the pennant to be. Cut the end, but not on the crease, repeat so you have a rectangle of fabric from the strip.
Step 4: Do the same thing with the heat bond so that your rectangles measures slightly less than your fabric rectangles. Now cut the heat bond rectangles in half because you are only going to need one of the halves to bond it to the fabric.
Step 5: Get the string that you cut and turn your iron on.
Step 6: Fold the rectangle in half with the string in the middle where the crease is. Slip the heat bond between the fabric with the paper side up. Run a medium-hot iron over the fabric. Lift up the fabric and the heat bond will be bonded to one side, gently peel back the paper side of the heat bond.
Step 7: Put the two pieces together and run the iron over the fabric to seal or bond the two pieces together.
Step 8: Get a ruler and find the middle of the rectangle at the bottom end, put a mark there with a piece of chalk. Cut diagonally from the corner to the middle from each side. Repeat these steps for all the rectangles to create the bunting.
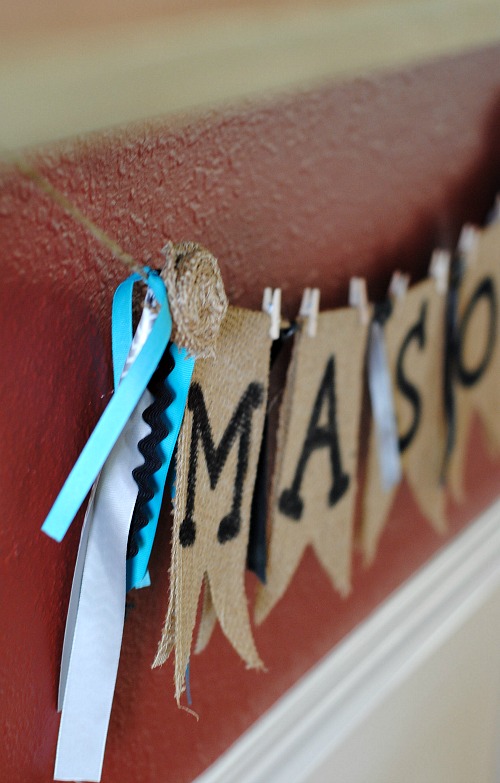
Step 9: Get a letter stencil and put on top of the fabric and use a permanent marker to color in, repeat for each letter.
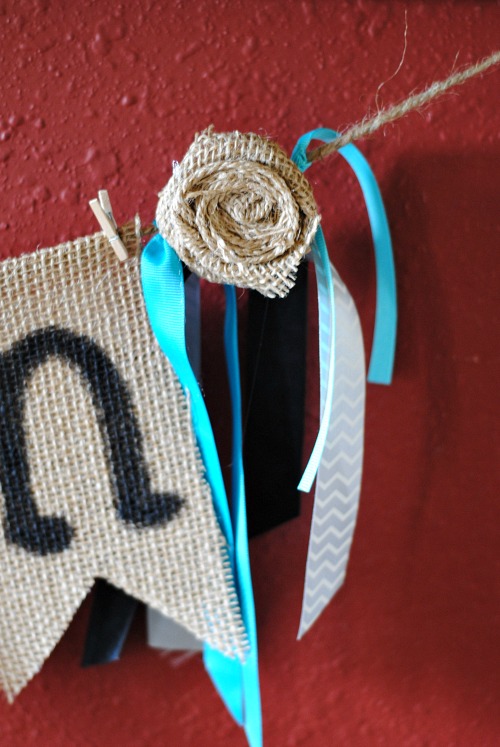
Step 10: Tie ribbon at the ends where the loop knots are. Cut different colors and types of ribbon and tie in a knot between each letter. I tied mine into a square knot so it would hang down correctly. Square knots are easy to tie, just put the ribbon where you want it and begin by bringing the right side of the ribbon over the top of the left side then again left over right. I did several of these ribbons at each end.
Step 11: Sew random size buttons onto each square knot between the letters, if you don’t want to sew them on a glue gun would work well here.